Core Data: Automate master data preloading
/ 4 min read
Table of Contents
Problem
Given a generic iOS application ‘Blog’ with data model as below:
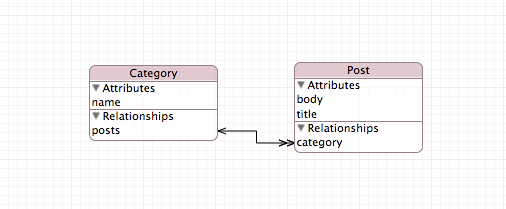
We want to prepopulate data for ‘Categories’ table in our SQLite database.
Solution
This solution uses the approach described in Core Data on iOS 5 Tutorial: How To Preload and Import Existing Data. We will create an OS X Command Line Tool application that references the data model in our ‘Blog’ application and prepopulates the data. We automate the building process.
Step 1
Make sure you are using Xcode Workspace with your project and skip to Step 2. If not, follow the steps below to create a new workspace:
- Open your project in Xcode
- Goto File > New > Workspace… or use the shortcut Command + Control + N
- Name the new workspace the same as your project and save it in your project folder.

- Quit Xcode
- Open the Workspace:
$ open Blog.xcworkspace - Drag your project from Finder to the Workspace

- You have successfully added your project into a workspace.
Step 2
- While your workspace is open, create a new project by selecting File > New > Project
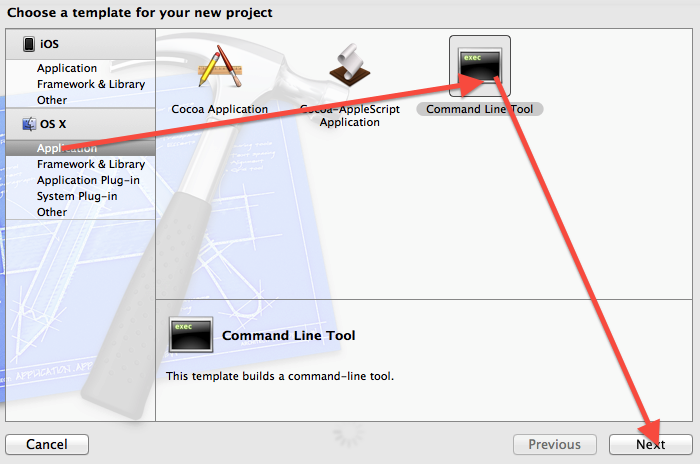
- From the prompt window select OS X > Application > Command Line Tool and click Next
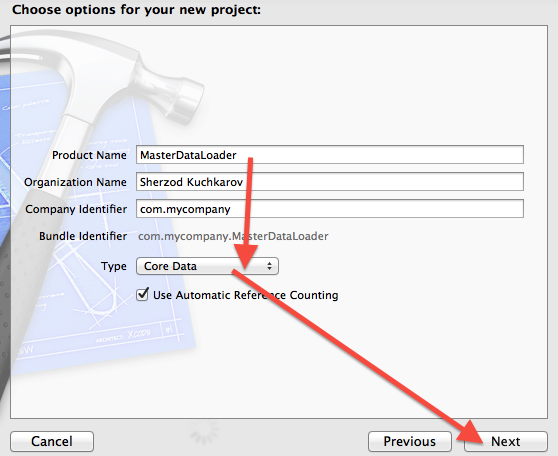
- Enter MasterDataLoader for the Product Name, select Core Data in the Type pulldown and click Next
- Select the folder where your workspace is stored, select your workspace for Add to and Group pulldowns. Click Create.

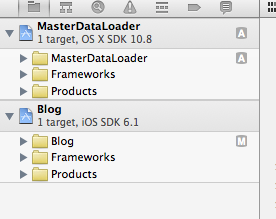
- Now you have two applications in your workspace
- Remove the MasterDataLoader.xcdatamodeld file from the MasterDataLoader application and Move to Trash
- Open the
main.mfile in the MasterDataLoader application - Change the lines in
managedObjectModel()andmanagedObjectContext()from:
NSString *path = @"MasterDataLoader";path = [path stringByDeletingPathExtension];and
NSString *path = [[NSProcessInfo processInfo] arguments][0];path = [path stringByDeletingPathExtension];to:
NSString *path = @"Blog";Now run MasterDataLoader application.
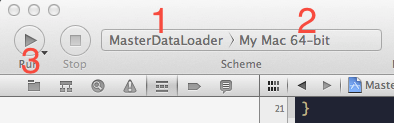
You should get an error Cannot create an NSPersistentStoreCoordinator with a nil model.
This confirms our command line app runs and cannot find a compiled data model object.
Step 3
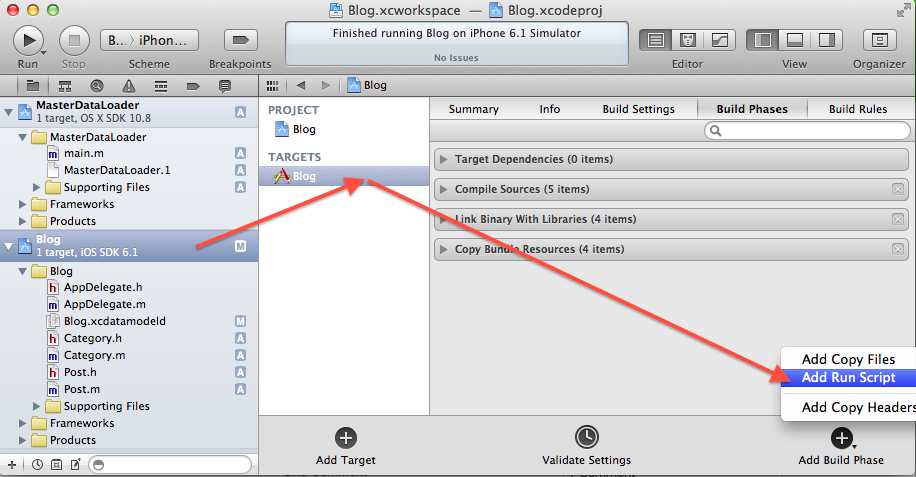
Add a new Run Script build phase to your ‘Blog’ application, name it Run MasterDataLoader and drag it under Compile Sources phase.

Paste this code in the run script you just created and save:
echo "Copying momd to MasterDataLoader folder"cp -R ${BUILT_PRODUCTS_DIR}/${TARGET_NAME}.app/${TARGET_NAME}.momd ${BUILT_PRODUCTS_DIR}/../${CONFIGURATION}/cd ${BUILT_PRODUCTS_DIR}/../${CONFIGURATION}/echo "Running MasterDataLoader"./MasterDataLoaderecho "Moving ${TARGET_NAME}.sqlite"mv ./${TARGET_NAME}.sqlite ${BUILT_PRODUCTS_DIR}/${TARGET_NAME}.app/echo "MasterDataLoder finished."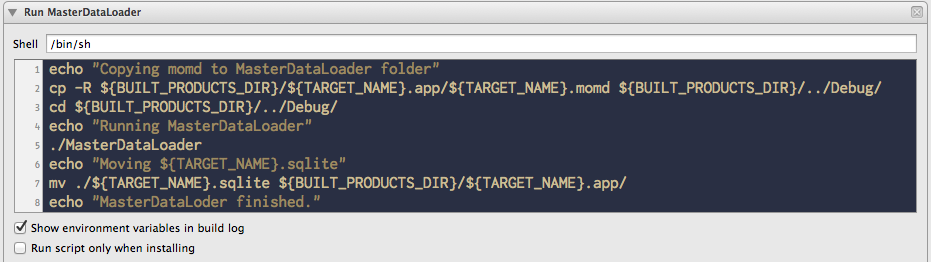
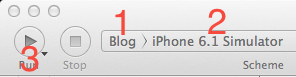
Edit the scheme for ‘Blog’ application. Add MasterDataLoader in build targets.
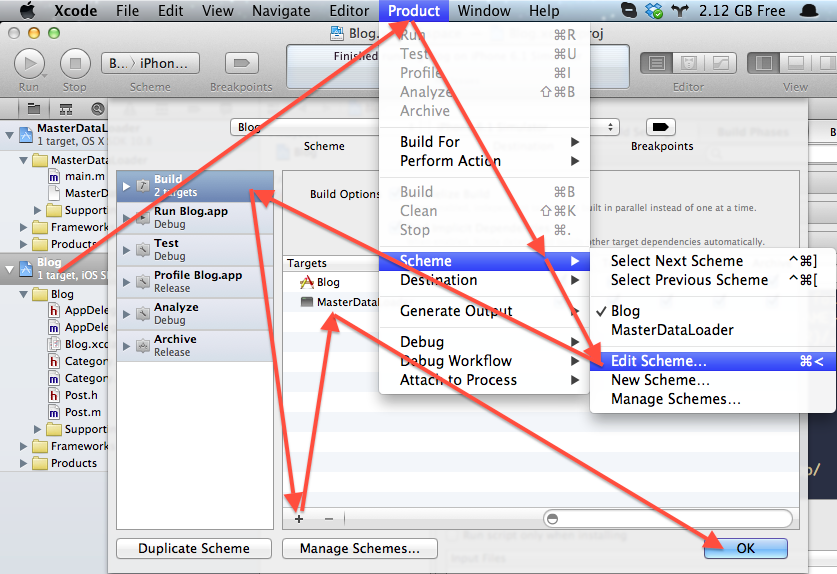
This makes sure MasterDataLoader is built before the ‘Blog’ app.
Step 4
Open AppDelegate.m in the ‘Blog’ application and add the following code:
if (![[NSFileManager defaultManager] fileExistsAtPath:[storeURL path]]) { NSURL *preloadURL = [NSURL fileURLWithPath:[[NSBundle mainBundle] pathForResource:@"Blog" ofType:@"sqlite"]]; NSError* err = nil; if (![[NSFileManager defaultManager] copyItemAtURL:preloadURL toURL:storeURL error:&err]) { NSLog(@"Oops, could copy preloaded data"); }}under the line:
NSURL *storeURL = [[self applicationDocumentsDirectory] URLByAppendingPathComponent:@"Blog.sqlite"];Here we check if the SQLite database already exists. If not, we copy the one from the main bundle to the ‘Documents’ folder.
Our SQLite database is empty right now. Let’s fetch ‘Categories’ and check if the table is empty.
Add the following code to application:didFinishLaunchingWithOptions: just before return YES:
NSFetchRequest *request = [[NSFetchRequest alloc] init];NSEntityDescription *entity = [NSEntityDescription entityForName:@"Category" inManagedObjectContext:self.managedObjectContext];[request setEntity:entity];NSError *error = nil;NSArray *cats = [self.managedObjectContext executeFetchRequest:request error:&error];for (Category *cat in cats) { NSLog(@"cat: %@", cat.name);}Do not forget to import Category.h:
#import "Category.h"Run the ‘Blog’ application. The console should print nothing.
Step 5
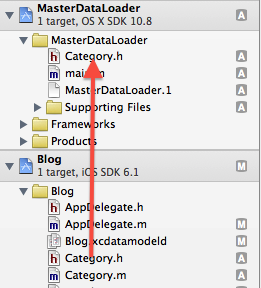
Let’s add some Categories. Drag the Category.h file from ‘Blog’ application to MasterDataLoader.
Open the main.m file. Import Category.h:
#import "Category.h"Replace the code in main() method:
// Custom code here...// Save the managed object contextNSError *error = nil;if (![context save:&error]) { NSLog(@"Error while saving %@", ([error localizedDescription] != nil) ? [error localizedDescription] : @"Unknown Error"); exit(1);}with:
NSArray *categories = @[@"objective-c", @"ruby", @"python"];for (NSString *name in categories) { Category *cat = [NSEntityDescription insertNewObjectForEntityForName:@"Category" inManagedObjectContext:managedObjectContext()]; cat.name = name; NSError *error = nil; if (![context save:&error]) { NSLog(@"Error while saving %@", ([error localizedDescription] != nil) ? [error localizedDescription] : @"Unknown Error"); exit(1); }}Before running
Delete ‘Blog’ application from the simulator.
Run
Run the ‘Blog’ application.
The console should print three categories:
2013-05-07 01:00:13.911 Blog[61827:c07] cat: objective-c2013-05-07 01:00:13.913 Blog[61827:c07] cat: ruby2013-05-07 01:00:13.913 Blog[61827:c07] cat: pythonDiscussion
This way you can reference any managed object from MasterDataLoader app and preload the data.